Network Interfaces
Introduction
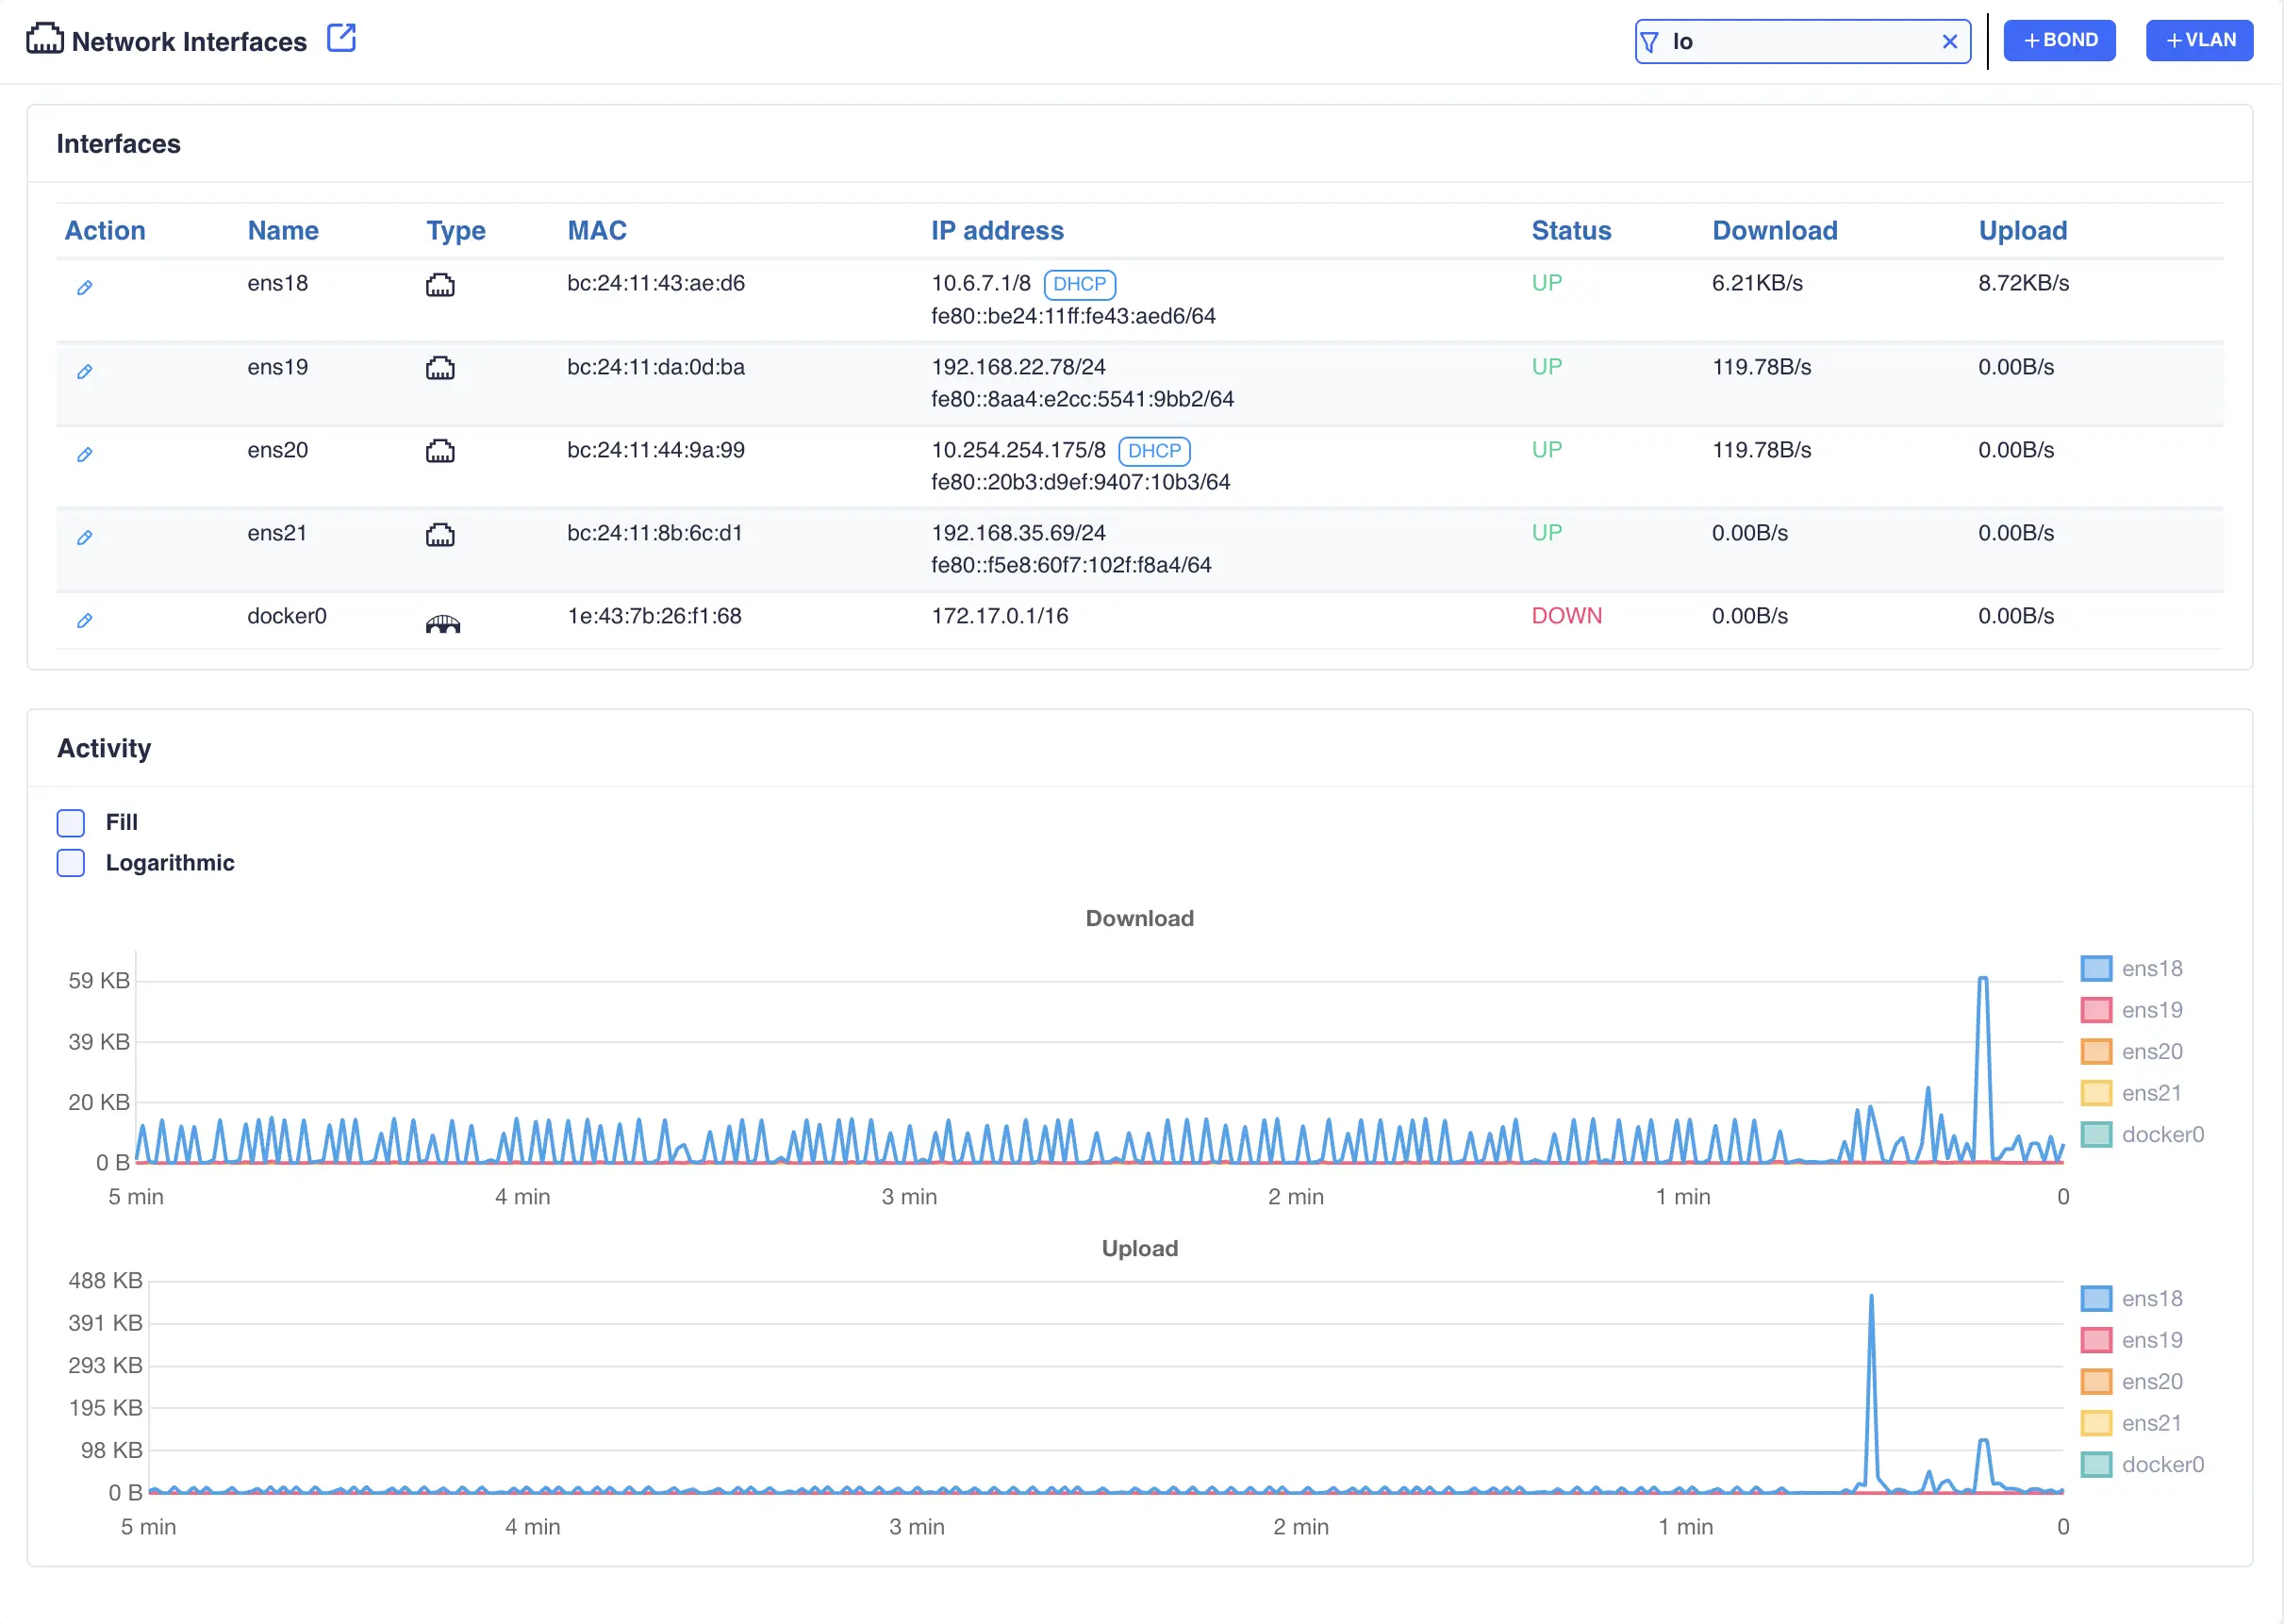
The Network Interfaces page provides a comprehensive interface for managing all system network connections through NetworkManager on Linux. It presents every detected interface in a detailed table showing its name, type, MAC address, IP configuration, operational status, and live upload/download activity. Use this page to edit interface settings, including IPv4/IPv6 addressing, DHCP configuration, the MTU, create bonded interfaces with selectable bonding policies, and define VLANs.
Each network interface discovered on the system is displayed in the Interfaces table. To hide interfaces
use the filter field at the top of the page; enter a comma‑separated list of interface names and press Return
to apply the filter. Hiding the loopback interface (lo) reduces noise in the activity graphs.
To support monitoring and troubleshooting, the page also includes two time‑based graphs that display five minutes of historical upload and download performance:
Graph options
The Fill check box switches to a filled line graph and the Logarithmic check box changes the
graph type to logarithmic. Clicking on an interface name in the legend hides/reveals that metric.
Edit interface
To modify the settings of a specific interface, click the  in the
 Action column. This opens the interface‑editing page to adjust addressing, DHCP mode, and MTU
or completely disable an interface:
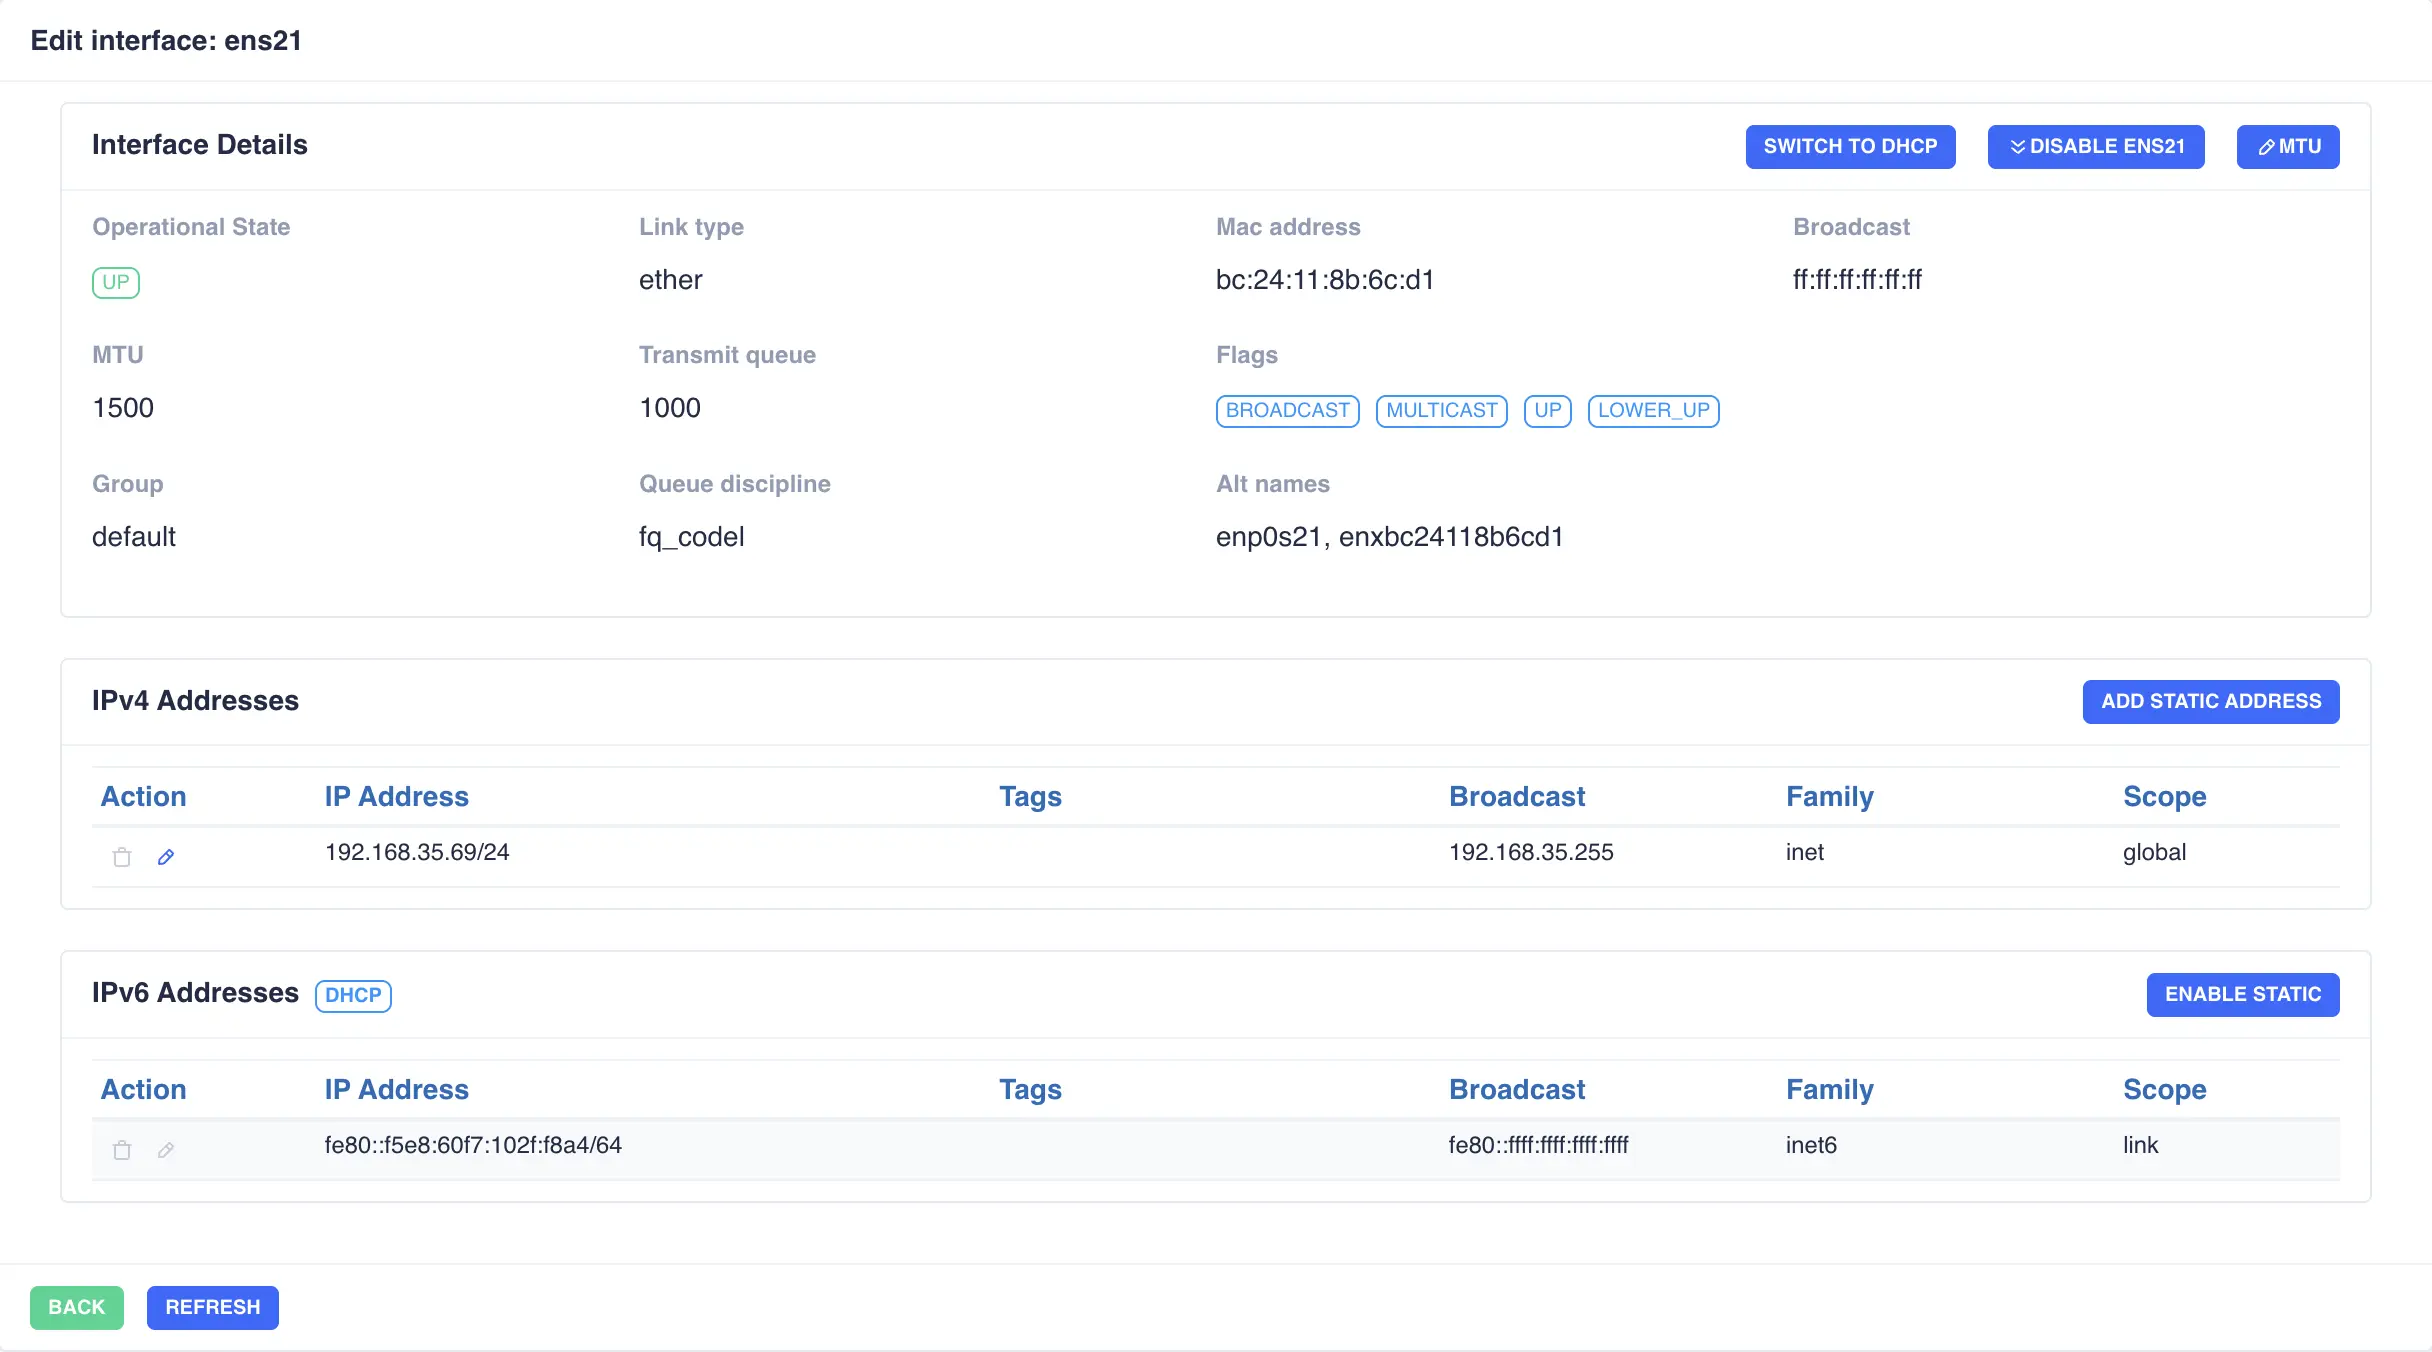
Switch to DHCP/Enable Static
DHCP
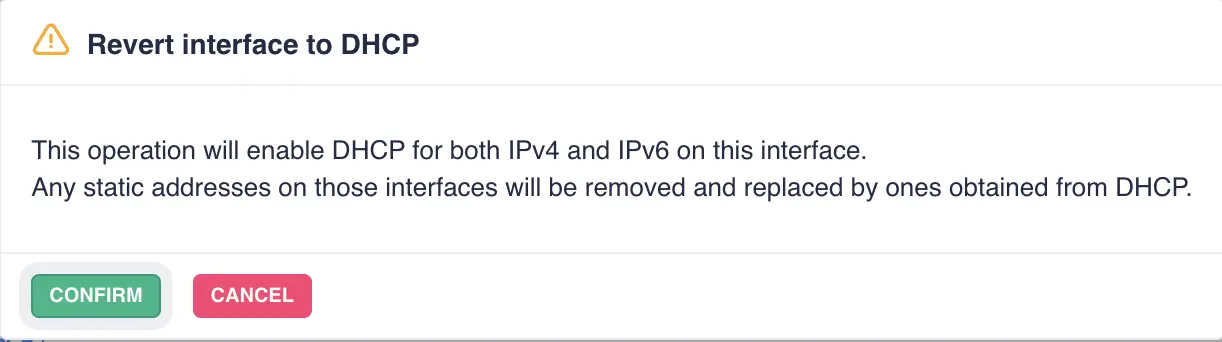
Switching an interface from static addressing to DHCP instructs the system to obtain its IPv4 and IPv6 configuration automatically from the network’s DHCP server.
Any manually configured address, gateway, or DNS settings are cleared and replaced with values provided by the DHCP service. This change may temporarily interrupt connectivity while the interface renews its lease, and any services or firewall rules that rely on the previous static address will need to be updated accordingly:
Static
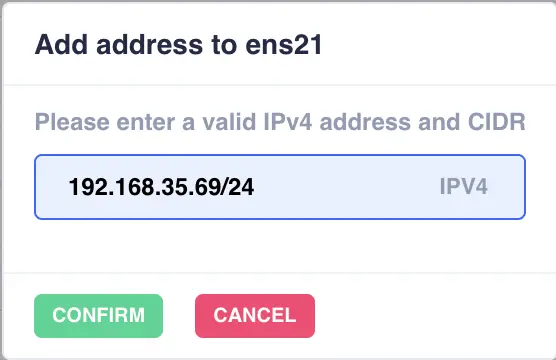
Switching an interface from DHCP to static addressing locks the interface to a fixed IPv4 and IPv6 configuration.
The system stops requesting leases from the DHCP server and instead applies the static address provided. This ensures the interface remains predictable for routing, firewall rules, or services that depend on a stable IP, but it may briefly interrupt connectivity while the interface transitions away from its previous DHCP assigned setting:
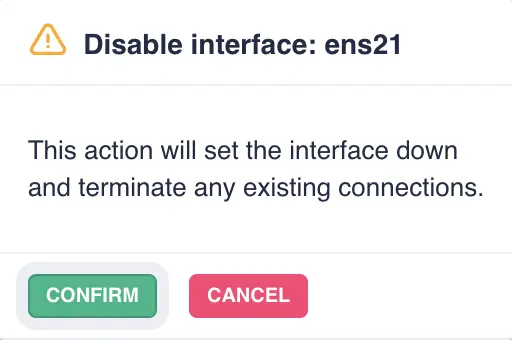
Disable Interface
Disabling a network interface immediately transitions the selected adapter into an offline state, preventing it from sending or receiving any network traffic.
When the action is triggered, the system instructs NetworkManager to bring the interface down, releasing any active DHCP leases, terminating ongoing connections, and removing the interface from routing decisions. The interface remains visible in the Interfaces table but is marked as inactive until it is manually re‑enabled:
When an interface has been disabled, the Interface page updates to reflect its offline state and presents the option to bring it back online. The interface is shown as inactive, with its status clearly marked as down and no addressing information displayed. Configuration fields remain visible for reference, but cannot be modified until the interface is re‑enabled:
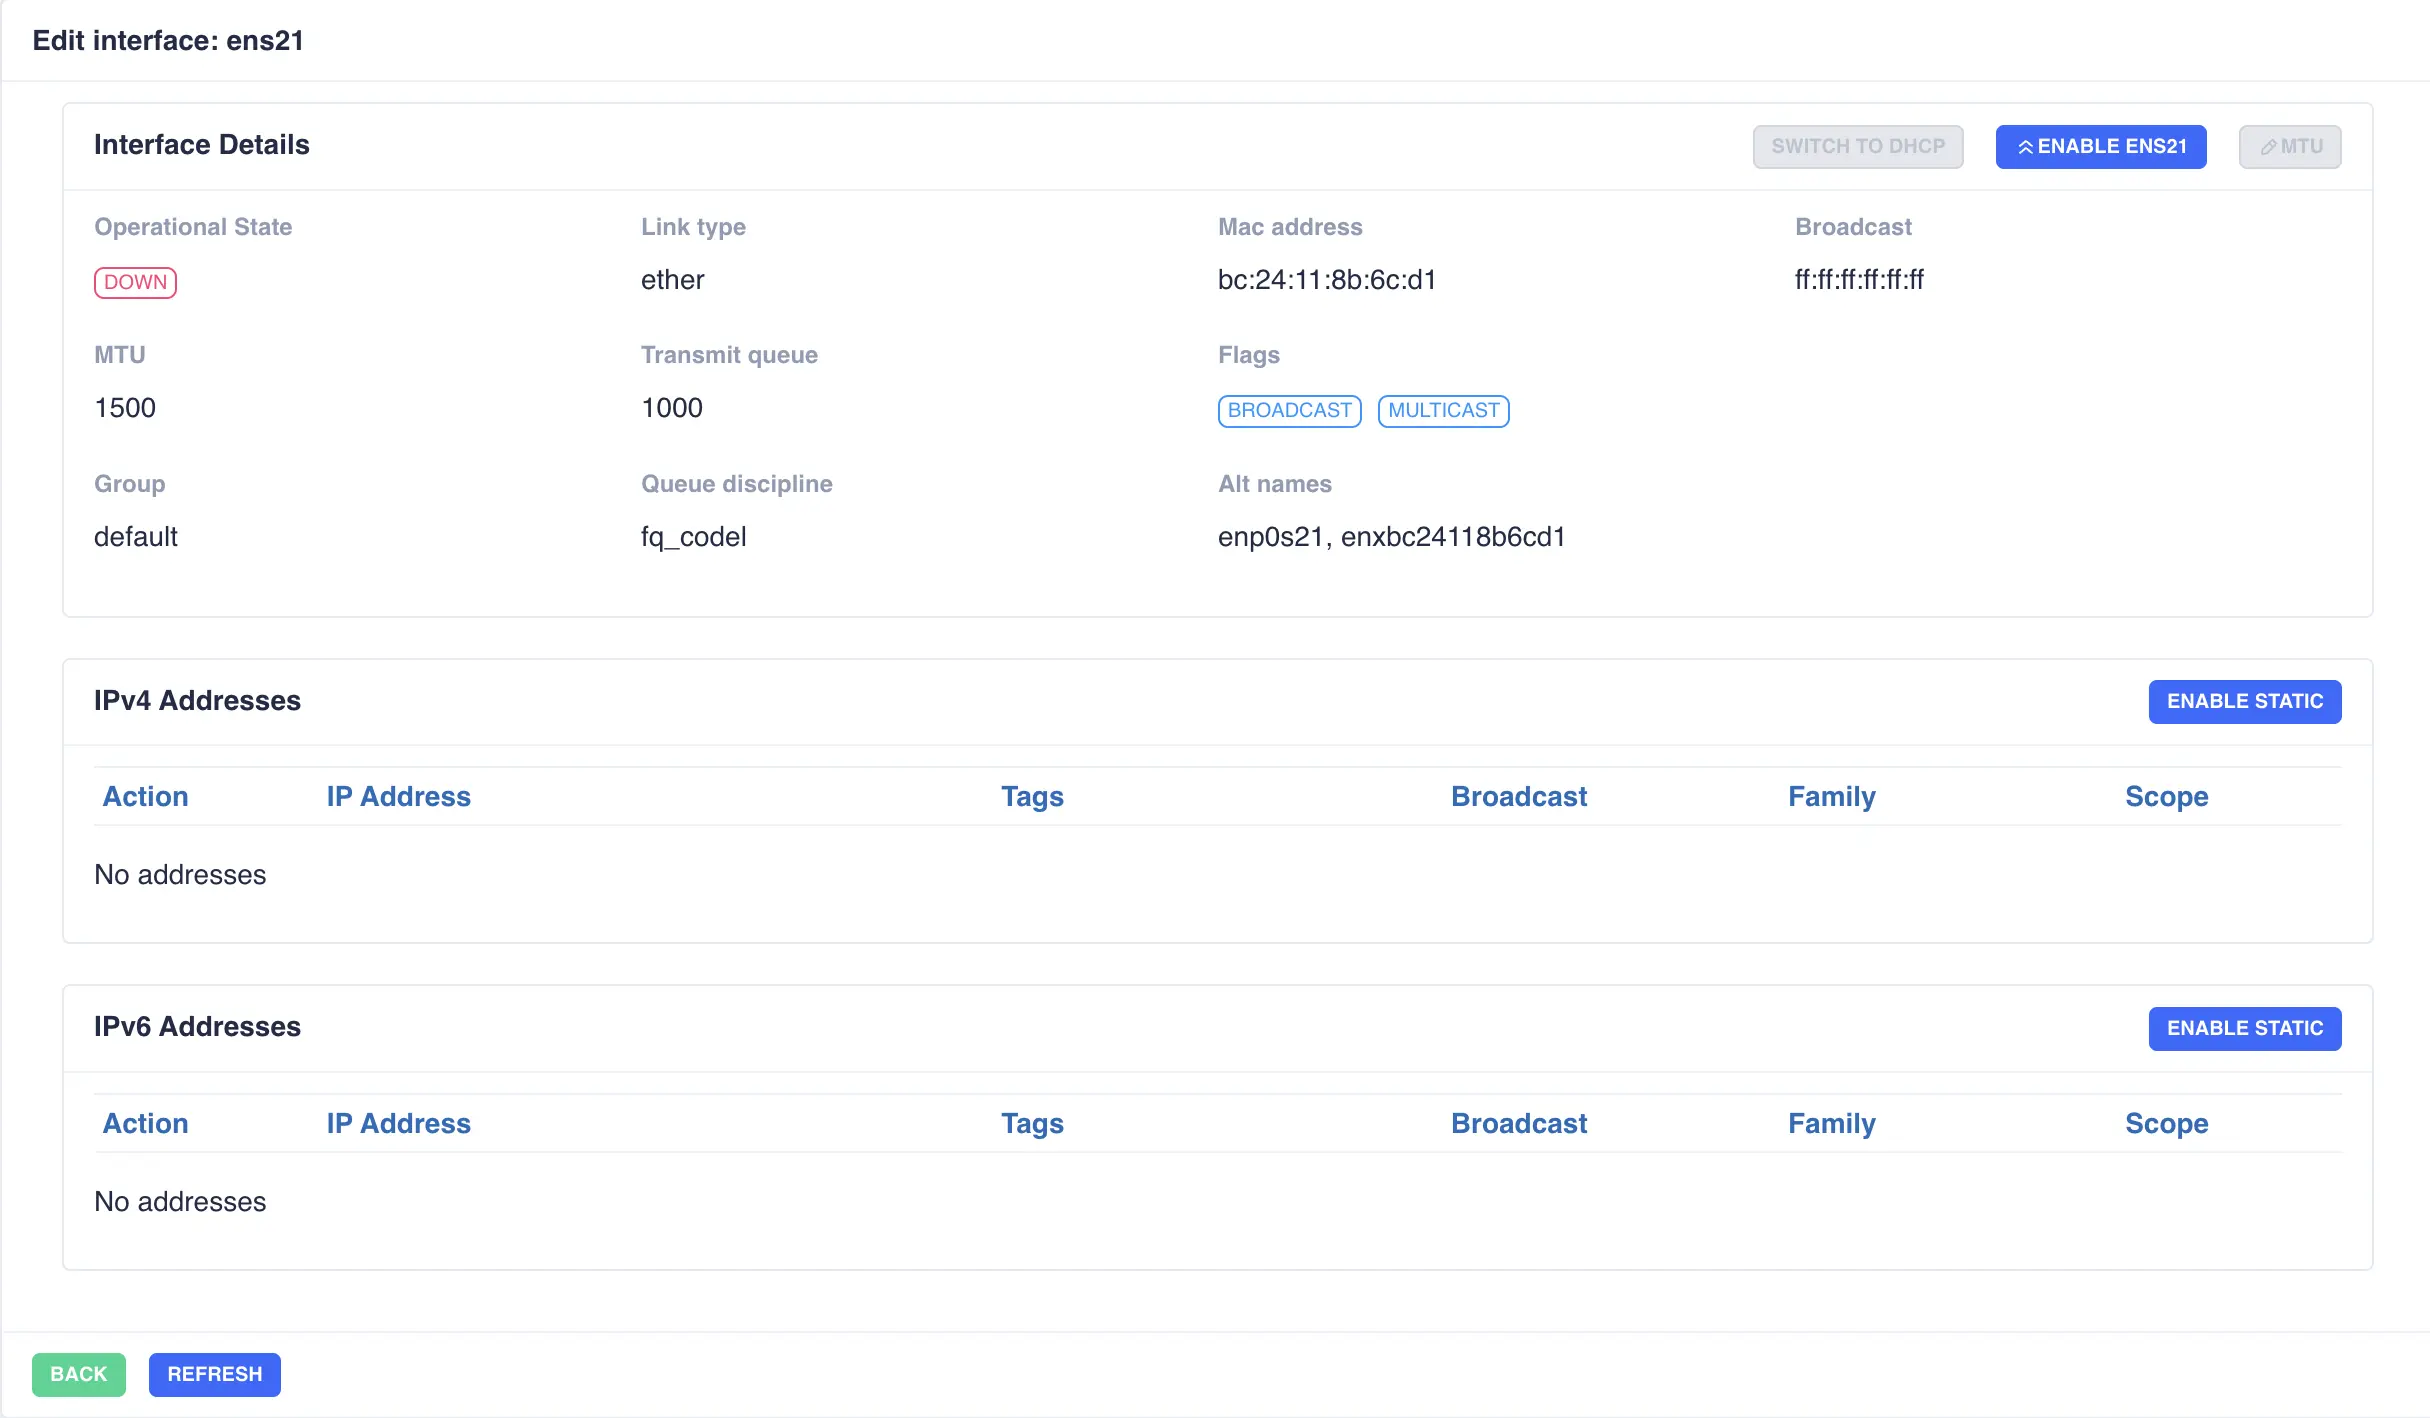
With the interface disabled, any static IPv4 or IPv6 settings you enter are simply stored and not applied until the interface is brought back online. The configuration panel remains available so you can prepare the addressing in advance, but the system will not activate those values while the interface is down. If you switch the interface from static addressing to DHCP while it is disabled, NetworkManager automatically brings the interface up so it can request a lease, as DHCP requires an active interface to obtain its configuration.
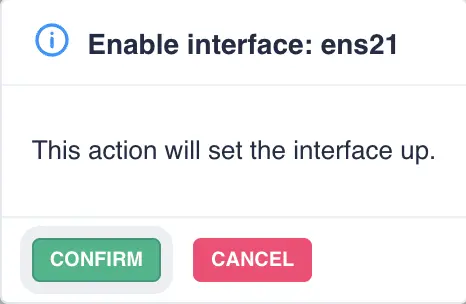
Finally, select the enable <interface> button to instruct NetworkManager to bring the interface
up again, reapply its configured addressing, and resume normal network activity:
Set MTU
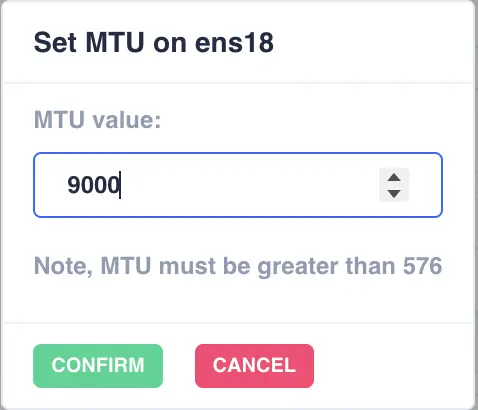
This dialog allows an administrator to modify the Maximum Transmission Unit (MTU) value of a selected network interface. The MTU defines the largest packet size, in bytes, that the interface can transmit without fragmentation.
The dialog contains a single numeric input field labeled MTU. The entered value must be an integer greater than 576; values of 576 or lower are rejected.
Clicking confirm applies the entered MTU value to the selected network interface and closes the dialog.
Adding a bond
To create a network bond click the + BOND button in the top right hand corner of the
interfaces page to bring up the bond page:
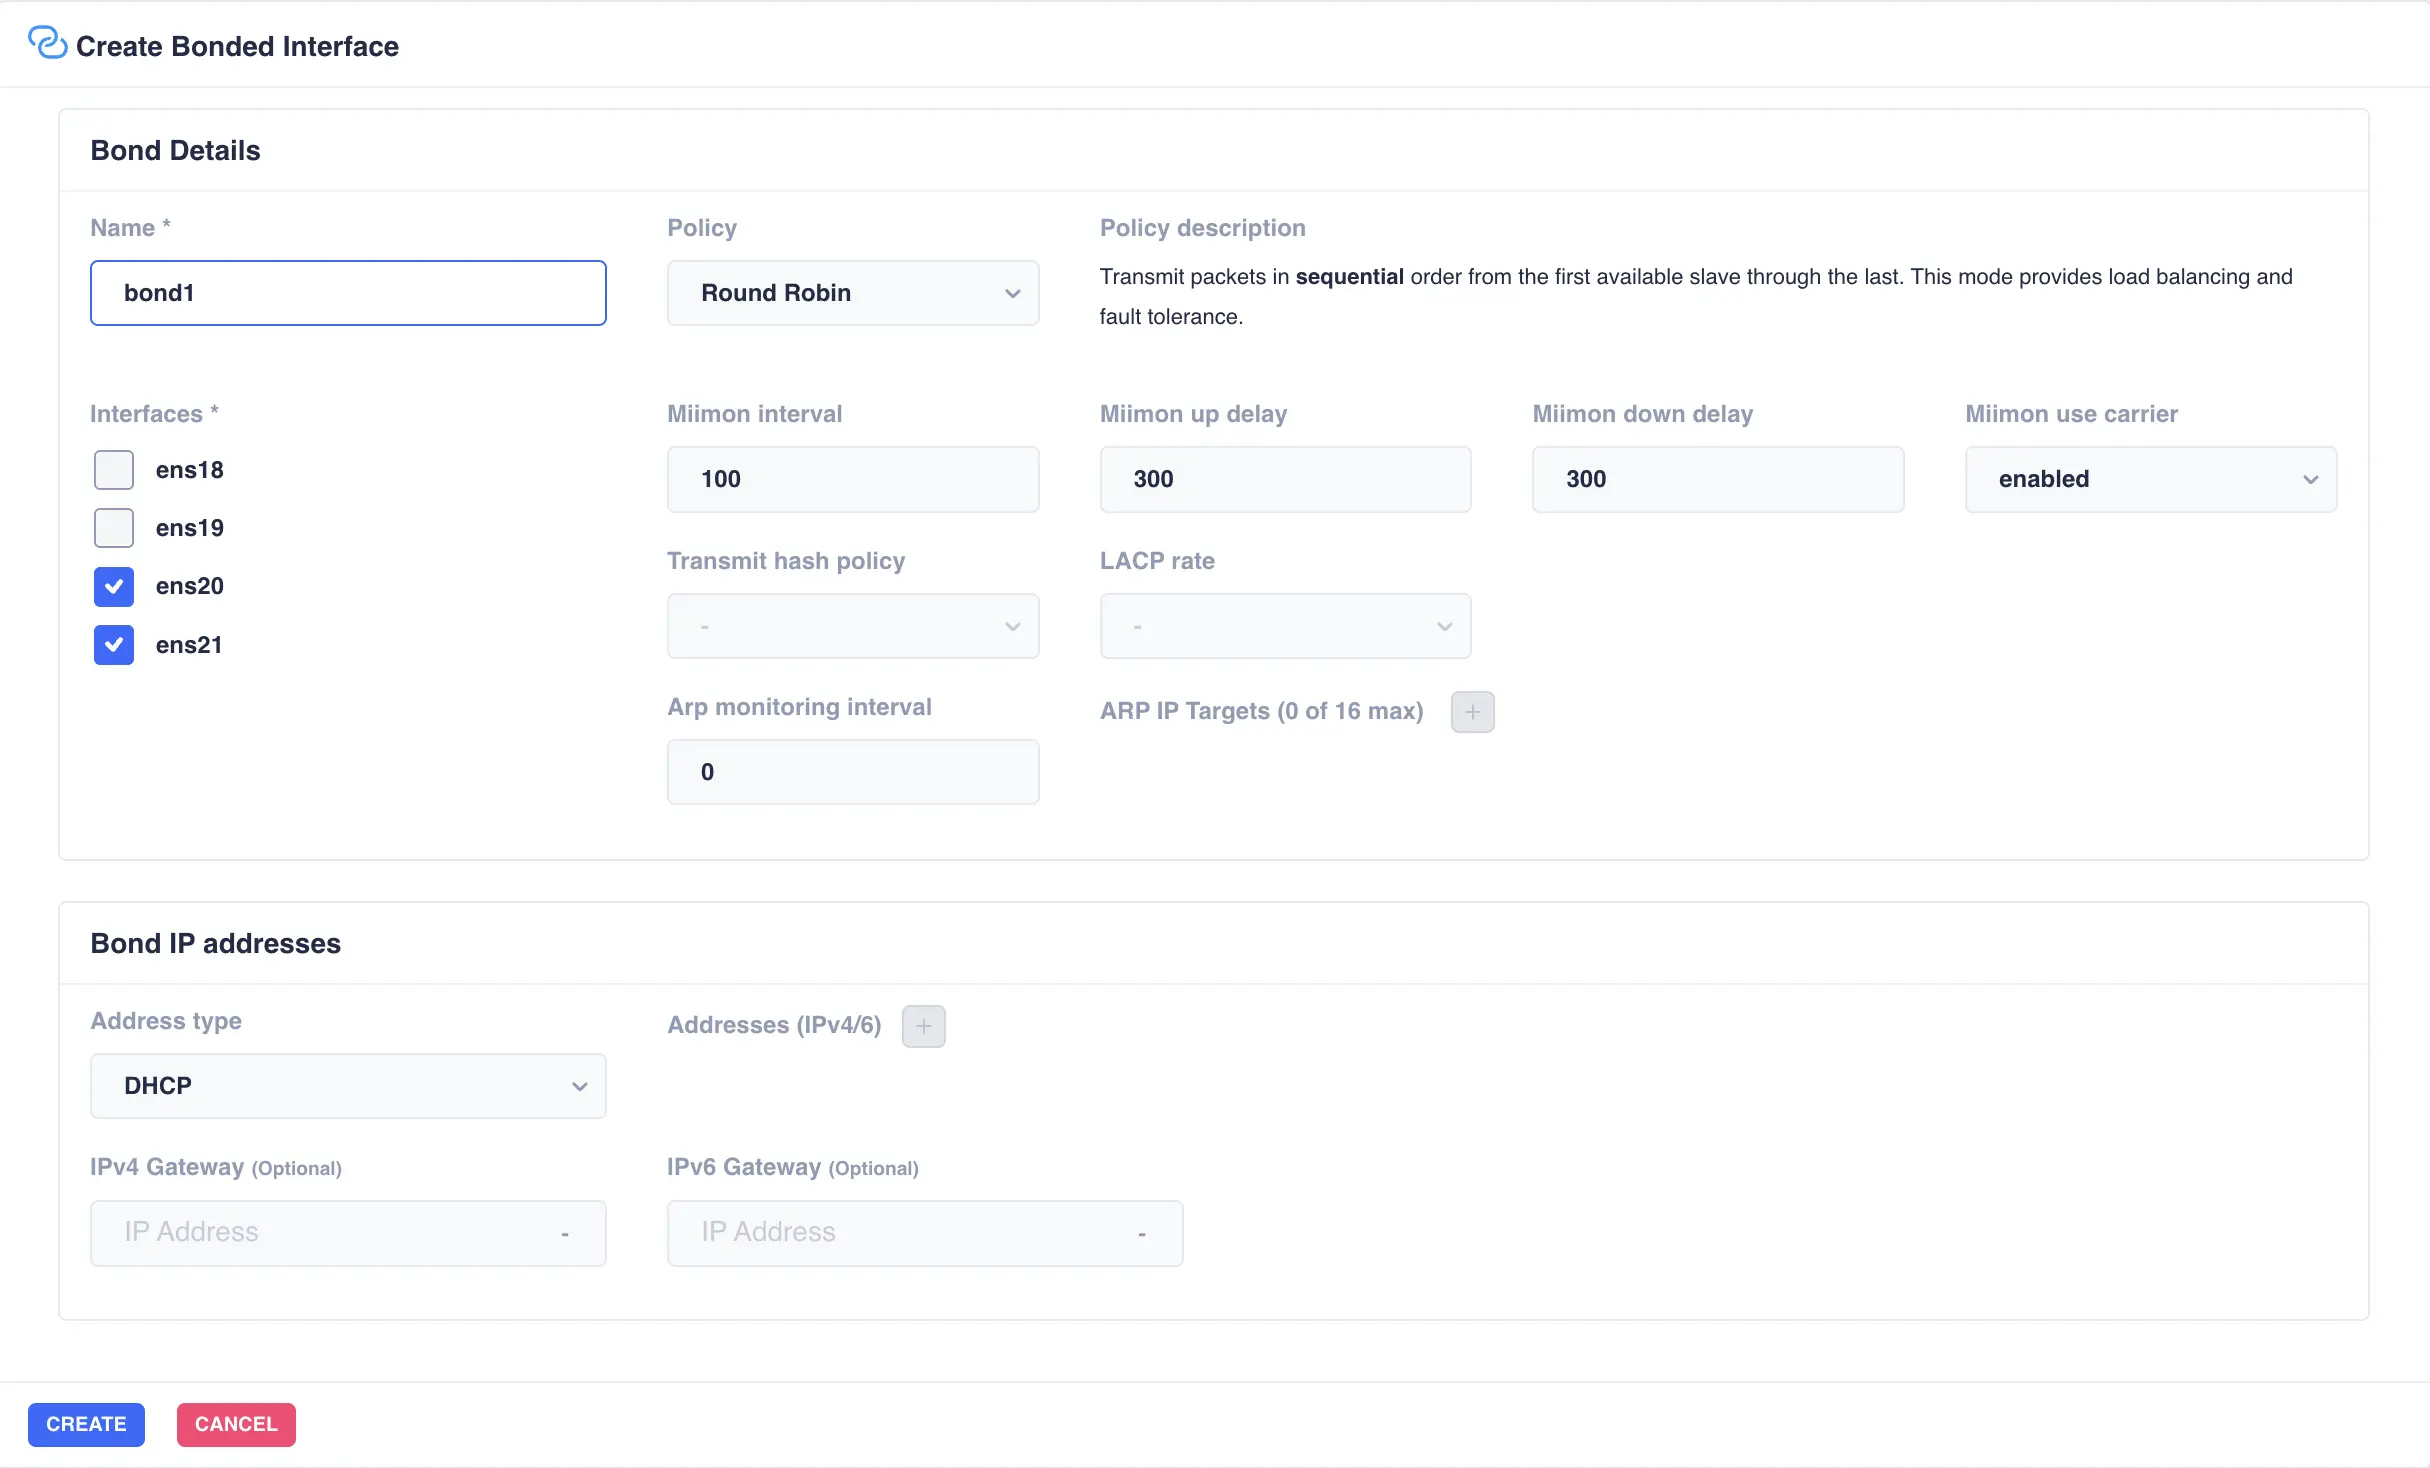
This page enables the creation of a new bonded network interface by aggregating two or more physical interfaces under a single logical interface. A bond name is required, and at least two member interfaces must be selected. More than two interfaces may be included.
Bond Details
| Field | Description |
|---|---|
Name * |
A unique identifier for the bond (for example, bond1). |
Policy |
The bonding mode that governs how traffic is distributed and how failures are handled. Available options are Round Robin, Active Backup, Balanced XOR, Broadcast, 802.3 Link Aggregation, Transmission Load Balancing, and Adaptive Load Balancing. A contextual description of the selected policy is displayed to the right of the control. |
Interfaces * |
Checkboxes listing available physical interfaces. Two or more interfaces must be selected. |
Miimon interval |
The link monitoring interval in milliseconds. |
Miimon up delay |
The delay, in milliseconds, before a recovered link is considered active. |
Miimon down delay |
The delay, in milliseconds, before a failed link is considered inactive. |
Miimon use carrier |
Enables or disables carrier-based link detection. |
Transmit hash policy |
Available according to the selected bonding policy. |
LACP rate |
Available according to the selected bonding policy. |
ARP monitoring interval |
When set to a value greater than zero, ARP monitoring is enabled and at least one ARP IP target must be specified. |
ARP IP Targets |
A list of up to 16 IP addresses used for ARP monitoring. The list is required when the ARP monitoring interval is greater than zero. |
Bond IP addresses
| Field | Description |
|---|---|
Address type |
DHCP or static. When static is selected, at least one IPv4 or IPv6 address must be entered. |
Addresses (IPv4/6) |
One or more static addresses may be added when the address type is static. |
IPv4 Gateway |
Optional IPv4 gateway. |
IPv6 Gateway |
Optional IPv6 gateway. |
All required fields and conditional requirements (minimum interface count, ARP targets when ARP monitoring is active, and at least one address when the address type is static) must be satisfied before the bond can be created.
Adding a vlan
To create a VLAN click the + VLAN button in the top right hand corner of the
interfaces page to bring up the VLAN page:
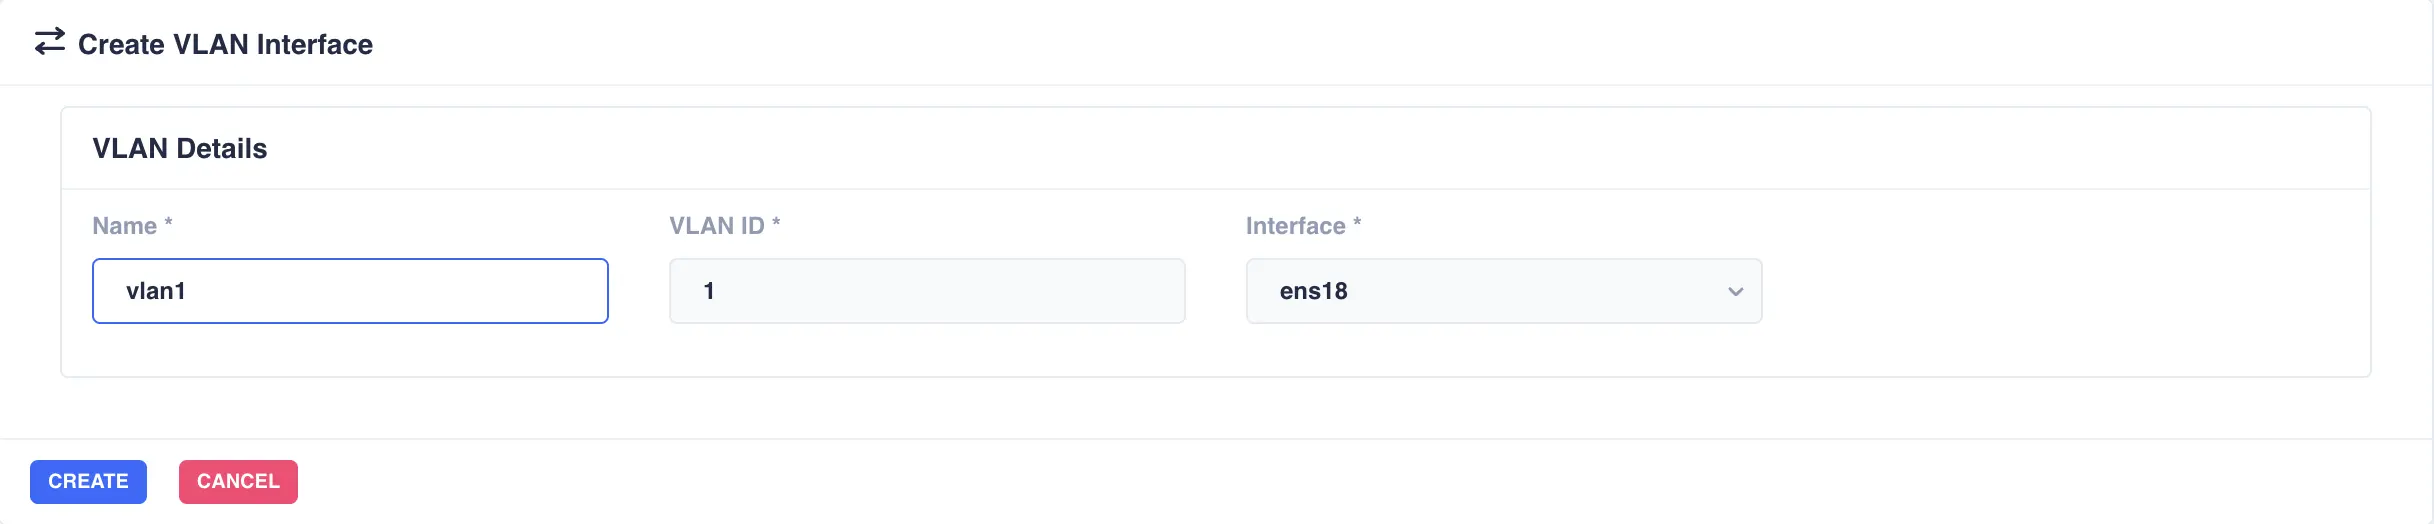
This page creates a new VLAN interface by attaching a logical sub-interface to an existing physical or bonded interface. A name, VLAN ID, and parent interface are all required.
VLAN Details
| Field | Description |
|---|---|
Name * |
A unique identifier for the VLAN interface. The field must be completed before the interface can be created. |
VLAN ID * |
The numeric VLAN identifier (1–4094). The value defaults to 1 and may be changed as needed. |
Interface * |
The parent interface on which the VLAN will be created. Available interfaces are presented in a dropdown list. |